






What is smoke testing?
Smoke testing means running a small set of high-priority tests to make sure a software build is stable enough for deeper testing. In QA, it’s the quick first pass that checks whether an application’s core functionality still works after a new build, deployment, update, or code change. It usually happens before the team spends time on more detailed regression, functional, or exploratory testing.
The goal is not to prove that the entire application is bug-free. That would be asking way too much from a smoke test. The goal is simply to confirm that the application is stable enough for the next stage of testing or release validation.
Think of smoke testing like a quick systems check. Before a pilot begins a flight, they do not inspect every mechanical component in detail. They run a pre-flight checklist to confirm the essentials are working. Smoke testing works the same way for software. It checks the basics before the team invests time in deeper testing.
Simple definition: The meaning of smoke testing is a quick check of an application’s most important features to make sure a new build is stable enough for further testing.
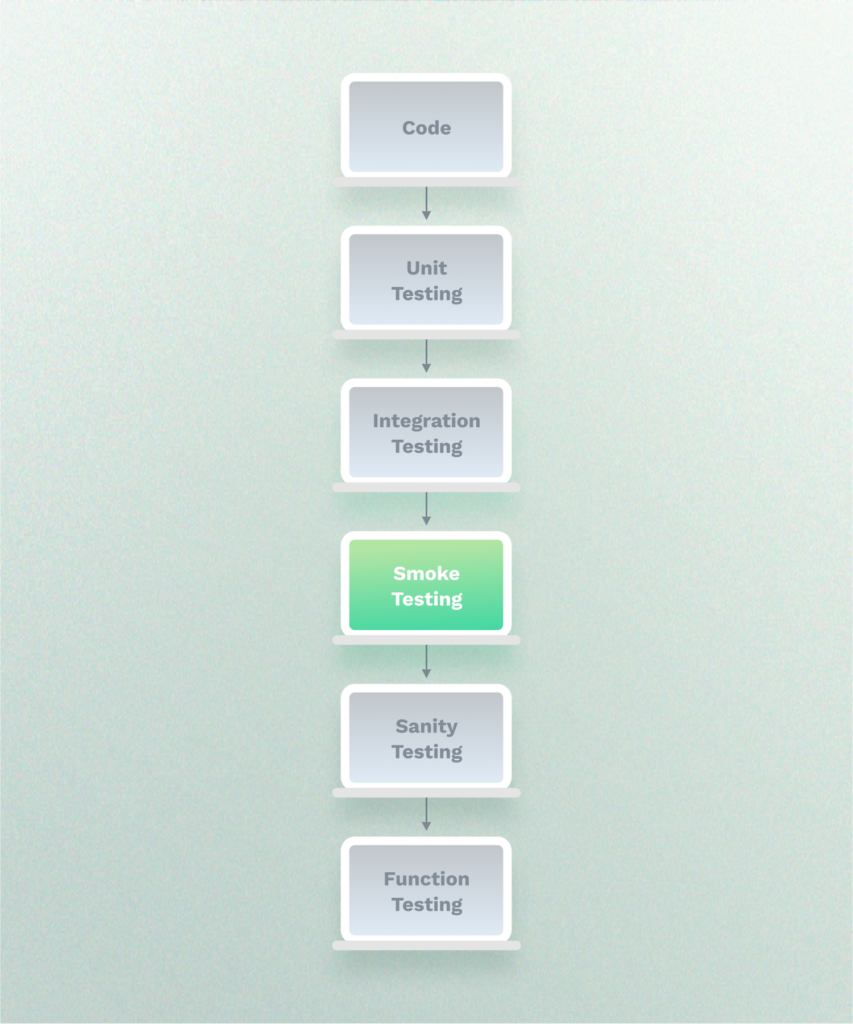
Smoke testing at a glance
Purpose: Confirm that the application’s most critical features work at a basic level.
Scope: Broad but shallow. It covers key workflows without testing every edge case.
When it runs: After a new build, deployment, release candidate, hotfix, or major configuration change.
Main question answered: Is this build stable enough to continue testing or release validation?
Typical example: Load homepage, log in, open dashboard, submit a key form, and confirm a success page.
Automation fit: High. Smoke tests are excellent candidates for automated browser testing and CI/CD checks.
Why is it called smoke testing?
The term “smoke testing” comes from hardware testing. Engineers would power on a new piece of hardware and check whether it started smoking. If smoke appeared, the device clearly had a major problem, so the team would fix the issue before moving into deeper testing.
Software smoke testing uses the same idea. If the most basic features fail immediately, the build is not ready for detailed QA. A failed smoke test is the software equivalent of seeing smoke: stop, investigate, and fix the bigger problem before pouring time into deeper testing. This is also why some teams use the phrase smoke check. The smoke check meaning is essentially the same idea: a quick validation that the most important parts of a system still work.
When and who should run smoke tests?
Smoke tests earn their keep at moments when a major issue would slow down the team or make it all the way to users. Common times to run a smoke test include:
- After a new build: Confirm that the latest build is stable enough for QA.
- After a deployment: Verify that production or staging still works after release.
- Before a release: Check critical workflows before shipping changes to users.
- After a hotfix: Make sure the urgent fix did not break another core workflow.
- During CI/CD: Automatically validate important flows every time your team merges or deploys new code.
- After infrastructure or configuration changes: Confirm that updates to hosting, DNS, authentication, payments, or integrations did not break the application.
For fast-moving teams, automated smoke tests can run multiple times per day. That might sound like a lot, but it is much cheaper than discovering after the fact that login, checkout, or another critical flow has been broken for hours.
At minimum, smoke testing should happen before QA begins a deeper test cycle, before major releases go live, after production deployments, after urgent fixes or patches, and after changes to key integrations, infrastructure, or authentication systems.
QA testers, developers, DevOps engineers, release managers, or product team members can perform smoke testing. In many organizations, teams share ownership.
Developers may run smoke tests locally or as part of a pull request workflow. QA teams may run smoke tests before beginning deeper functional or regression testing. DevOps teams may trigger smoke tests after deployment to staging or production.
The important thing is that someone owns the smoke testing process and that the team knows what should happen when a smoke test fails. Otherwise, the alert becomes noise instead of a useful release checkpoint.
What should a smoke test include?
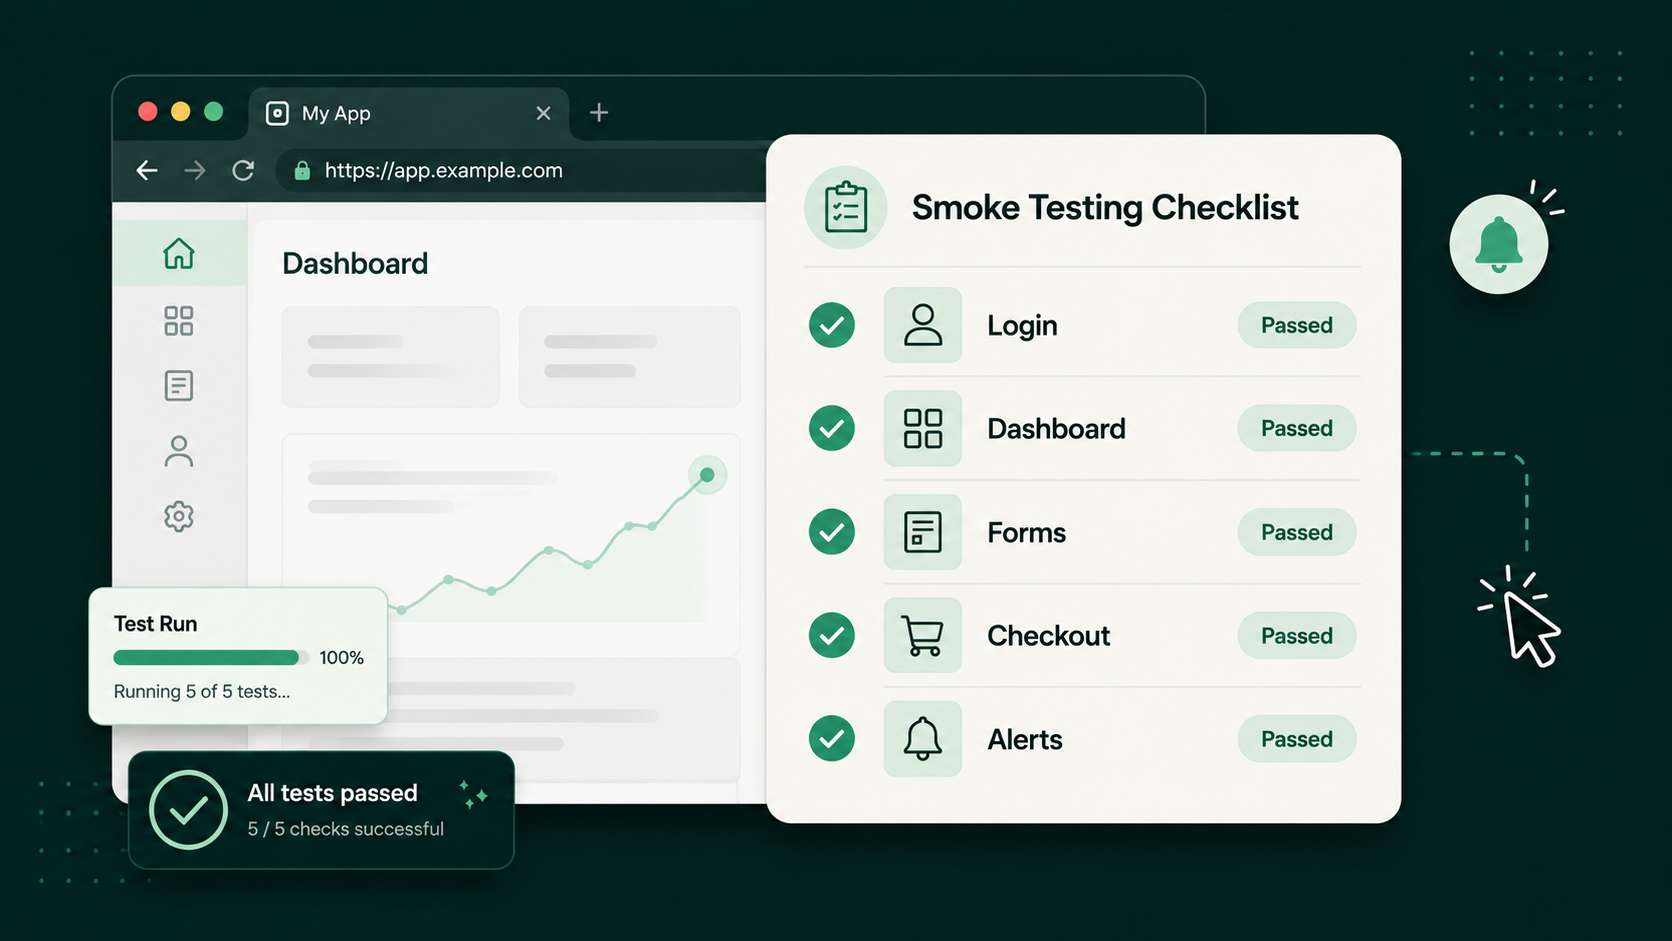
A strong smoke test suite should focus on the workflows that absolutely must work for the product to be usable. These are usually the flows tied to logging in, accessing core product areas, completing primary user actions, and confirming that important integrations are available.
Common items in a smoke testing checklist
- The homepage or application entry point loads successfully.
- Users can sign up, log in, or authenticate.
- Authenticated users can access the main dashboard or account area.
- Primary navigation works.
- Users can submit key forms.
- Important pages return the expected status and content.
- Critical third-party integrations are reachable.
- Checkout, booking, or conversion flows work if they are central to the business.
- Confirmation messages, success pages, or expected redirects appear.
The best smoke tests are intentionally selective. If the suite includes everything, it stops being a smoke test and starts turning into a slower regression test. Keep it short enough to run frequently, but meaningful enough to catch problems that would block users or QA.
What is smoke testing in QA?
In QA, smoke testing is an early validation step used to decide whether a build should move forward into deeper testing. It gives the team a clean go/no-go moment before anyone spends time testing a build with obvious problems in critical workflows.
For example, if a SaaS application deploys a new release and users can no longer log in, there is no point in running a full regression suite yet. First fix the blocking issue, then retest the build. Smoke testing helps the team avoid doing careful QA work on a build that is already clearly broken.
Smoke testing in QA is especially useful because it creates a clear go/no-go checkpoint. If the smoke test passes, QA can continue with more detailed functional, regression, usability, or exploratory testing. If it fails, the build goes back to the development team for investigation.
Smoke testing example for a web application
Imagine a SaaS company deploys a new version of its web application. Before the QA team begins full regression testing, they run a smoke test that checks the most important user paths.
Example smoke test flow
- Open the homepage and confirm it loads.
- Click the login button.
- Log in with a test account.
- Confirm the dashboard loads.
- Create a new item, project, report, or test.
- Save the item and confirm a success message appears.
- Navigate to the account or settings page.
- Log out successfully.
If that flow passes, the team has a basic level of confidence that the build is stable. If the login page fails, the dashboard does not load, or the save action breaks, the build should be fixed before deeper testing continues.
What are the different types of smoke testing?
Teams can run smoke testing manually, automatically, or through a hybrid process. There is no single “correct” setup for every team. The right approach depends on the team’s release process, application complexity, and testing maturity.
Manual smoke testing
In manual smoke testing, a tester, developer, or product team member walks through the key workflows by hand. This can work for small teams or early-stage products, but it becomes time-consuming and inconsistent as the application grows.
Automated smoke testing
Automated smoke testing uses software to run the same critical checks on a schedule, after deployments, or inside a CI/CD pipeline. Automated smoke tests are especially valuable for web applications because they can simulate real browser actions like clicking, typing, navigating, and verifying page content.
Hybrid smoke testing
A hybrid approach combines automated checks with occasional manual review. For example, a team might automate login, dashboard access, and checkout, while QA manually reviews a newly redesigned page or feature area before release.
Smoke testing vs. sanity testing
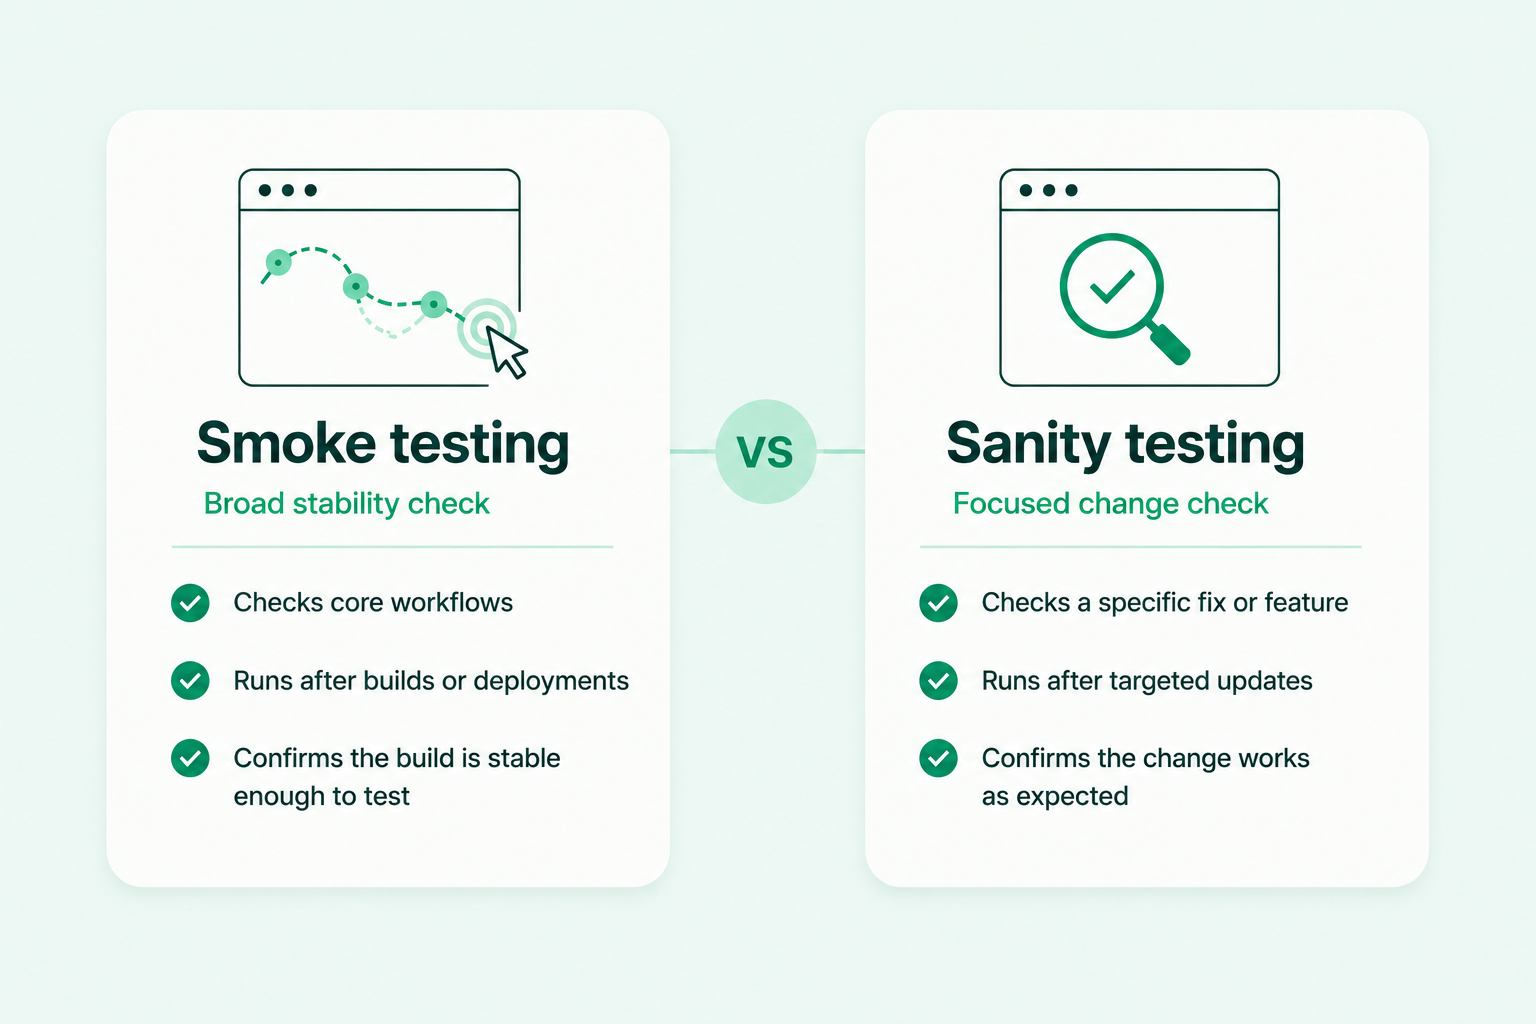
Smoke testing and sanity testing are related, but they are not the same. Smoke testing checks whether the overall build is stable enough for additional testing. Sanity testing is usually narrower and confirms whether a specific bug fix, change, or feature area works as expected.
Purpose: Smoke testing confirms the build is basically stable. Sanity testing confirms a specific change or fix works.
Scope: Smoke testing is broad and shallow. Sanity testing is narrow and focused.
When it happens: Smoke testing usually happens after a build or deployment. Sanity testing usually happens after a targeted change, bug fix, or small update.
Main question: Smoke testing asks, “Can we keep testing this build?” Sanity testing asks, “Did this specific thing work?”
For a deeper comparison, check out our related blog on smoke testing vs. sanity testing.
How to automate smoke testing with Ghost Inspector
Because smoke tests check repeatable, business-critical workflows, they are one of the best types of tests to automate. Automated smoke testing helps teams run the same checks consistently without relying on someone to manually click through the application after every change.
This is where Ghost Inspector fits naturally. Teams can create automated smoke tests for websites and web applications without writing code, record key user flows in the browser, schedule them to run automatically, and receive alerts when something breaks.
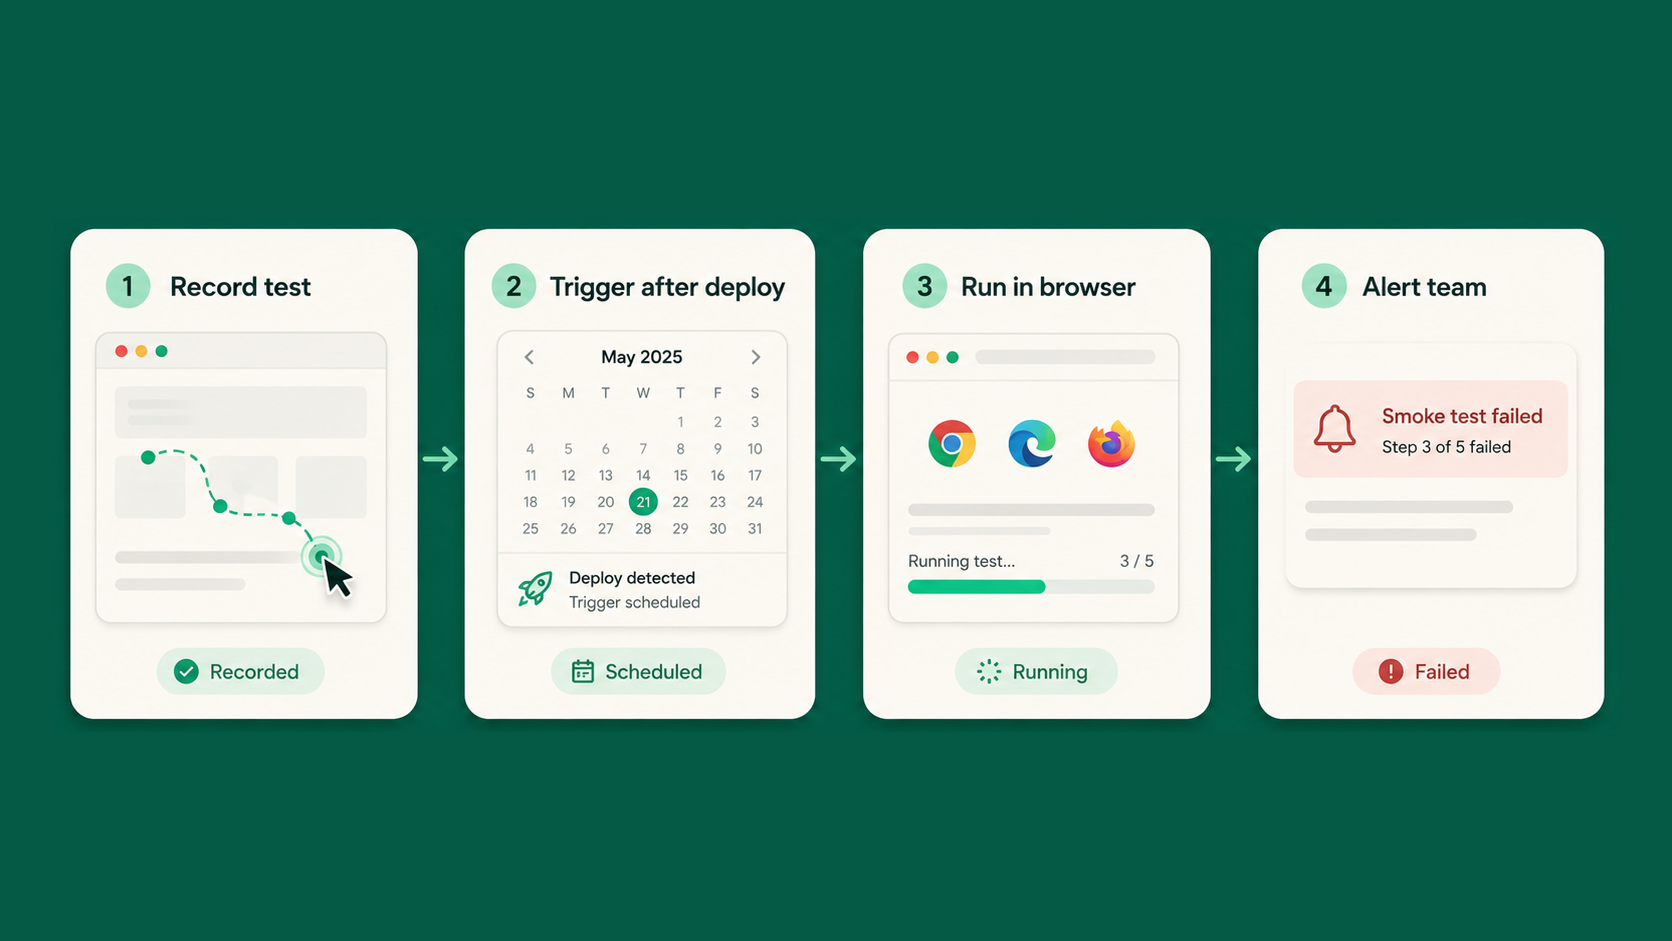
How to build an automated smoke test
- Choose your critical user paths: Start by identifying the workflows your users rely on most, such as logging in, submitting a lead form, completing checkout, creating a project, or accessing a dashboard.
- Record the smoke test: Use Ghost Inspector to record the steps a real user would take in the browser, including clicks, form entries, navigation, assertions, and visual checks.
- Add clear pass/fail checks: Each smoke test should confirm that the expected result appears, such as a visible dashboard after login or a success message after form submission.
- Schedule tests or connect them to your deployment process: Run smoke tests on a schedule, after deployments, or as part of your CI/CD pipeline.
- Send alerts when tests fail: When a smoke test fails, Ghost Inspector can notify your team so they can investigate before users are affected.
Benefits and best practices for automated smoke testing
- Faster release confidence: Teams can quickly confirm whether a build is stable enough to continue.
- Less repetitive manual work: QA teams do not have to manually repeat the same basic checks after every deployment.
- Earlier bug detection: Major issues are caught before deeper testing or before users report them.
- Better CI/CD coverage: Smoke tests can become part of the deployment process.
- Improved team visibility: Alerts and reports help engineering, QA, and product teams stay aligned.
To keep smoke tests useful, keep the suite short, run it often, make failures actionable, and review tests regularly as the product changes. Smoke testing should not replace deeper QA work. Think of it as the front door to the rest of your testing process: if the basics fail, the team should know before walking further in.
Smoke testing FAQs


How many smoke tests should a team have?
Most teams only need a small smoke test suite that covers their most important user paths. For a simple web app, that might mean five to ten tests. For a larger product, it may be more, but the goal is still the same: cover the workflows that would block users or stop QA if they failed.
How long should a smoke test suite take to run?
A smoke test suite should run quickly enough that the team will actually use it. Many teams aim for a few minutes, especially when smoke tests run after deployments or inside a CI/CD workflow. If the suite takes too long, review whether some tests belong in regression testing instead.
What should happen when a smoke test fails?
A failed smoke test should pause deeper testing or release validation until someone investigates the issue. The team should confirm whether the failure is a real product problem, an environment issue, or a flaky test. Once the blocking issue is fixed, rerun the smoke test before continuing.
Should smoke tests run in staging, production, or both?
Many teams run smoke tests in staging before release and use a smaller, safer set of smoke tests in production after deployment. Production smoke tests should avoid risky actions like real purchases, destructive data changes, or anything that could affect users.
How do you choose what belongs in a smoke test?
Start with the workflows your users and business depend on most. Login, signup, checkout, dashboards, lead forms, account access, and critical integrations are common candidates. If a broken workflow would block users or make the product feel unavailable, it probably belongs in your smoke test suite.
Do smoke tests replace regression testing?
No. Smoke tests help teams decide whether a build is stable enough for deeper testing. Regression testing goes further and checks whether new changes broke existing functionality across a wider part of the product.
Conclusion
Smoke testing is one of the fastest ways to confirm whether a new build, deployment, or update is stable enough for additional testing. It is not glamorous, but it is incredibly useful: check the most important workflows first, catch major issues early, and avoid wasting time on builds that are not ready.
For web applications, automated smoke testing is especially valuable. Teams can record core flows like login, signup, checkout, dashboard access, and form submissions once, then run them repeatedly after every important change.
If you’d like to check out Ghost Inspector’s powerful automated testing features for yourself, you can start a 14-day free trial, no credit card required. And if you’d like to get the full rundown on how Ghost Inspector can help you build and run smoke tests (and much more), schedule a free demo with us here!