


Keeping up to the pace of software changes with good acceptance tests is challenging, and can often put a lot of pressure on the relationships between teams. Being able to detect issues faster and earlier in the development cycle is crucial to shipping good software quickly, but communicating those changes is always challenging — and if software changes, so must the tests.
This is why we’re super excited to be talking about a critical feature we offer, which allows you to version your Ghost Inspector tests with your source code.
What is Version Control?
Version control systems (VCS), sometimes called source control management, are used to keep track of the changes that happen within a software project. Some of the most common VCS systems today are git, subversion and mercurial. Keeping track of changes is important because it allows you to determine when a project was changed and by whom, and will usually contain a log message as to why the change was made at that time. VCS systems also generally have mechanisms for reversing and comparing changes between copies (or branches) of the project. Many online providers like GitHub and Atlassian Bitbucket allow you to store your project centrally and stage your changes as “Pull Requests”, a team-friendly view of what changed that is ready for review.
With our on-demand testing feature, you can store a copy of your test in version control alongside your code so your test changes can be updated and reviewed in the same manner as your code.
Let’s dive in.
What tools do we need?
We’re going to be using a few different tools for this example:
- git a very popular version control system
- GitHub a centralized service for storing git projects for teams
- GitHub Actions a build automation platform from GitHub
- Ghost Inspector CLI our official CLI tool for interacting with Ghost Inspector
- ngrok a command-line tool that creates secure VPN tunnels to allow temporary access to private websites
- An example application see below
A look at our application
For the purposes of this project we’re going to use a simple Bootstrap example to get a site up and running quickly, here’s what it’s going to look like:

The project structure looks like this, you can find the code on GitHub:
.
├── .github/
│   └── workflows/
├── dist/
│   ├── assets/
│   ├── css/
│   └── js/
├── scripts/
├── src/
│   ├── assets/
│   ├── js/
│   ├── pug/
│   └── scss/
└── tests/
We’ll assume that the site is deployed to a public location, but you can also run it locally for the next steps.
Recording a simple test
With that up and running let’s record a simple test that covers a basic (but critical) use case:
- Click on the Contact link in the header
- Fill out the contact form
- Assert that a success reponse was received
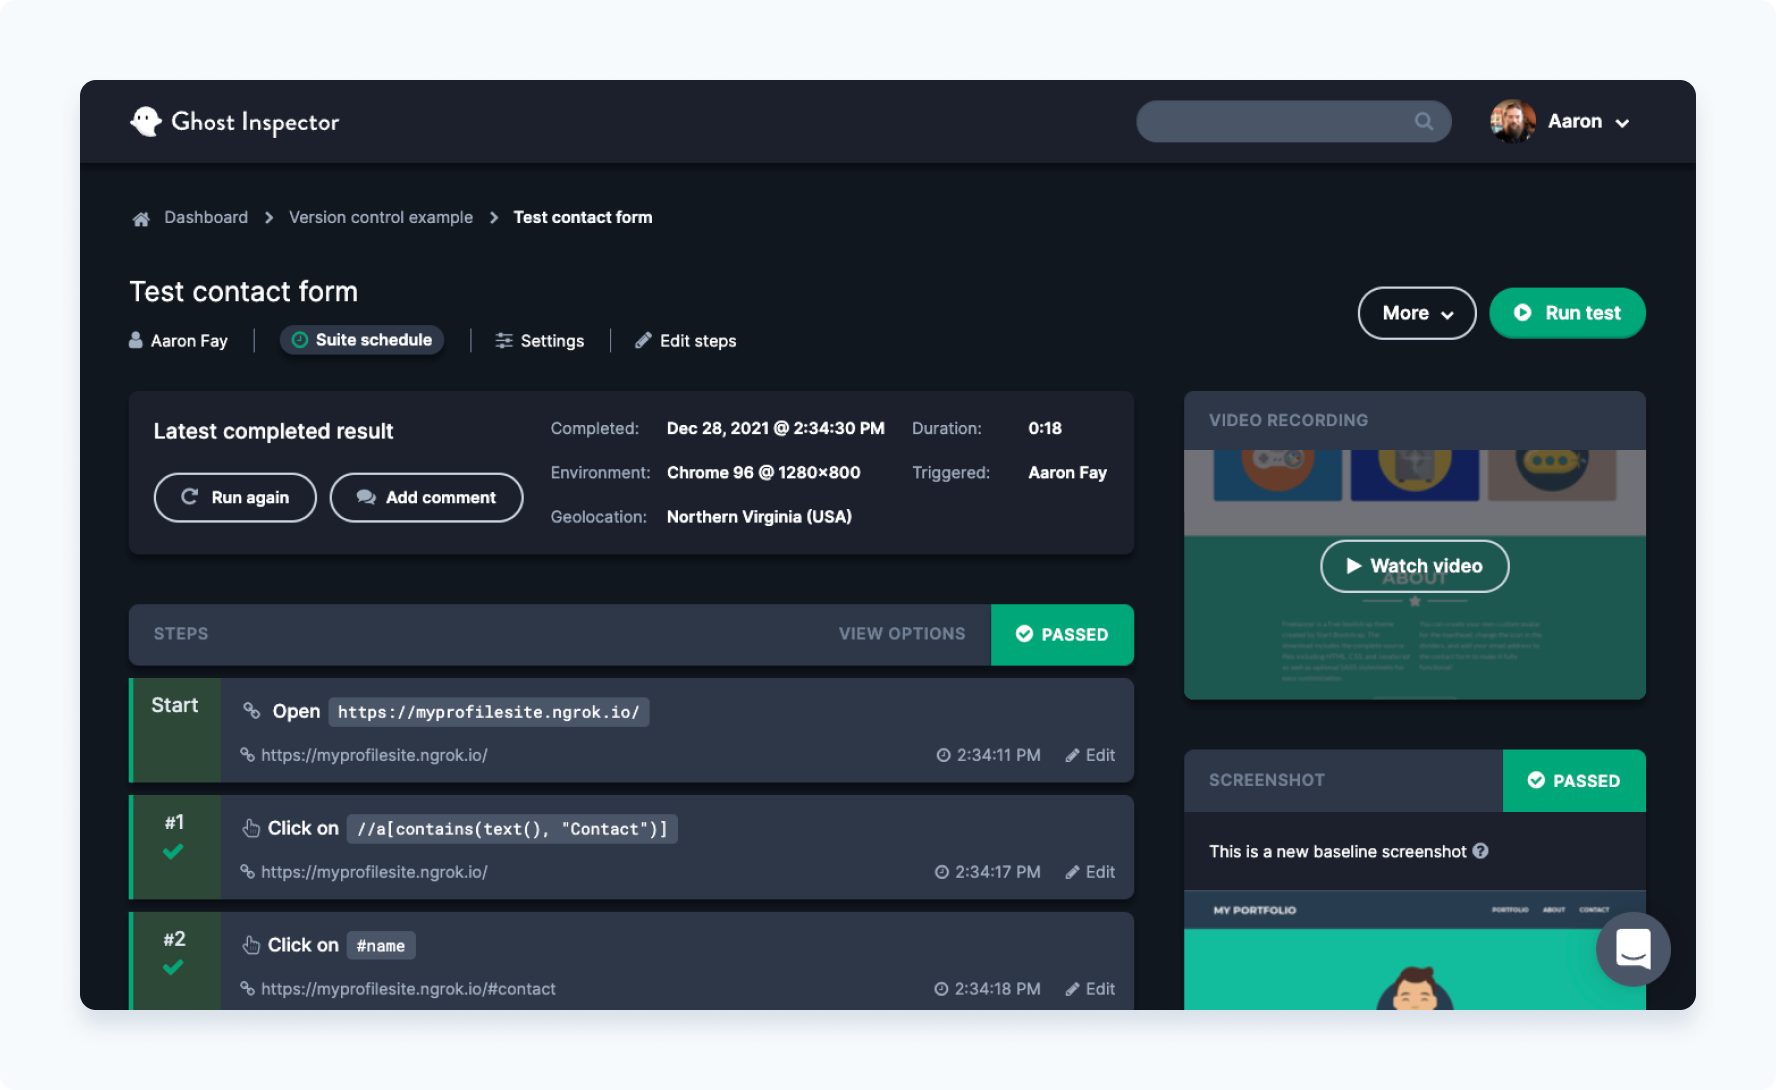
Using the test recorder, putting together this test is pretty quick and simple:
We’ll run the test once to get a baseline result within Ghost Inspector.
Saving the test with the code
Next we’ll export the test from our suite. Navigate to the test and select More > Export Test. By default the Ghost Inspector format will be selected. Click Download:
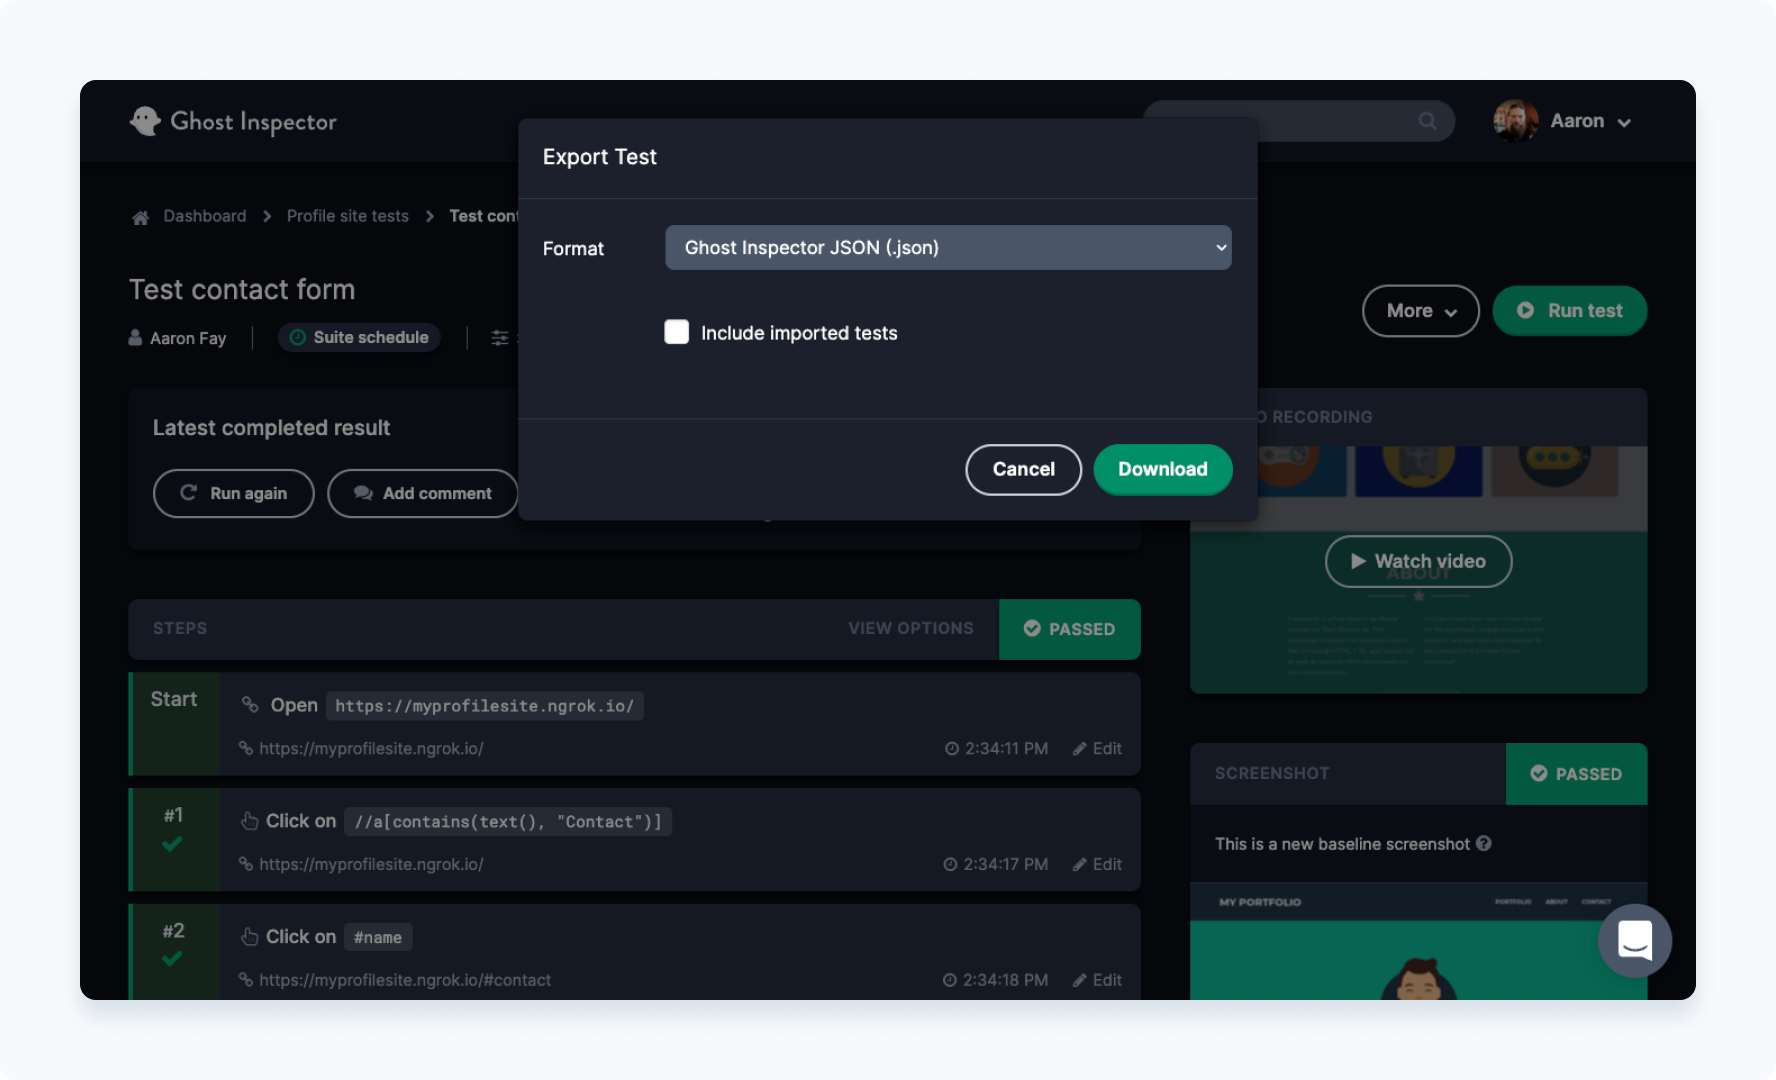
By default the downloaded file will be named with the ID of the test we just exported, so let’s to rename it to test-contact-form.json and move it to the /tests folder of our project:
...
└── tests/
    └── test-contact-form.json
For brevity I’ve removed some of the default attributes from the test (you don’t have to), the final version I have downloaded looks something like this:
{
  "_id": "61cb90e3ba9eca5b80081a51",
  "name": "Test contact form",
  "steps": [
    {
      "command": "click",
      "target": [
        { "selector": "//a[contains(text(), \"Contact\")]" },
        { "selector": "a[href=\"#contact\"]" }
      ]
    },
    {
      "command": "click",
      "target": "#name"
    },
    {
      "command": "assign",
      "target": "#name",
      "value": "Hanne Filaro"
    },
    {
      "command": "assign",
      "target": "#email",
      "value": "hello@hanne-filaro.com"
    },
    {
      "command": "assign",
      "target": "#phone",
      "value": "1235467890"
    },
    {
      "command": "assign",
      "target": "#message",
      "value": "Hey there!"
    },
    {
      "command": "click",
      "target": [
        { "selector": "//button[contains(text(), \"Send\")]" },
        { "selector": "#submitButton" }
      ]
    },
    {
      "command": "assertTextPresent",
      "target": ".fw-bolder",
      "value": "Form submission successful!"
    }
  ]
}
Note: by leaving the _id in the JSON file each on-demand execution will be linked back to the original test in your account. To execute a test arbitrarily (without linking it to an existing test), simply remove the _id field.
For a full list of attributes available to on-demand tests, see our documentation.
Regular builds add confidence
Keeping secrets
Before we can add the GitHub workflow, there are a few secrets we need to add to our repository. This can be done under Settings > Secrets in your project repo.
The following secrets should be added:
GI_ORGANIZATION_ID: this is the ID of the organization you want to run the on-demand test under, you can find it in your account under Settings > Organization > Details > Organization ID. Note that the test must exist within the organization for the on-demand results to be linked properly.GI_API_KEY: your Ghost Inspector API key, find it under Settings > User Account > Details.NGROK_TOKEN: find this on your ngrok dashboard
Our workflow configuration
In order to test out new features quickly, we’re going to also set up a build within our GitHub project to automatically run our test. This is simple enough by adding a workflow to our .github/workflows folder, we’ll call it test-contact-form.yml:
.
├── .github/
│   └── workflows/
│       └── test-contact-form.yml
...
Here’s what our test-contact-form.yml file looks like:
name: Test contact form
on: [pull_request]

jobs:
  test:
    runs-on: ubuntu-latest
    container:
      image: node:12-alpine
      # this will be used by the Ghost Inspector container
      options: --network-alias node-app
    steps:
      - uses: actions/checkout@v2
      - name: Install & run web app
        run: |
          # Install our app
          npm install .
          # Start the app on the desired port ('&' to run in the background)
          npm run start:ci -- --port=9000 &
          # Pause for a moment to let things start up
          sleep 3

      - name: Execute Ghost Inspector test, on-demand
        uses: docker://ghostinspector/cli
        with:
          args:
            test execute-on-demand ${{ secrets.GI_ORGANIZATION_ID }} /github/workspace/tests/test-contact-form.json \
            --apiKey ${{ secrets.GI_API_KEY }} \
            --ngrokTunnel node-app:9000 \
            --ngrokUrlVariable startUrl \
            --ngrokToken ${{ secrets.NGROK_TOKEN }} \
            --errorOnFail
There’s a fair bit going on here, so we’ll break it down:
Give the workflow a name, and run it on a pull request. Note that you can configure your workflow to run under many different scenarios, see the GitHub Actions docs for more details:
name: Test contact form
on: [pull_request]
This specifies ubuntu-latest as our task host, node:12-alpine as the application environment for our profile site, and then sets up a docker network alias to our application so the CLI container can access it later:
runs-on: ubuntu-latest
container:
  image: node:12-alpine
  # this will be used by the Ghost Inspector container
  options: --network-alias node-app
The first step in our job uses the GitHub checkout action to retrieve our project code, and then the second step installs the app and runs it in the background with &. Notice that we specify --port=9000 which will need to be consistent later when we launch the CLI command. Finally we sleep for a few seconds to allow everthing to start properly:
- uses: actions/checkout@v2
- name: Install & run web app
  run: |
    # Install our app
    npm install .
    # Start the app on the desired port ('&' to run in the background)
    npm run start:ci -- --port=9000 &
    # Pause for a moment to let things start up
    sleep 3
The final step uses the Ghost Inspector CLI docker image to execute our test. Even though the original step is executing within a docker context already (node:12-alpine), we’re specifying a different image (ghostinspector/cli) to use for the second step.
Let’s break this command down further and explain all the details:
- name: Execute Ghost Inspector test, on-demand
  uses: docker://ghostinspector/cli
The first line of the CLI command executes the on-demand test tests/test-contact-form.json using the GI_ORGANIZATION_ID secret. We access the workspace code from /github/workspace:
test execute-on-demand ${{ secrets.GI_ORGANIZATION_ID }} /github/workspace/tests/test-contact-form.json \
The next flag loads our API key from secrets:
--apiKey ${{ secrets.GI_API_KEY }} \
Next is the VPN tunnel — this is where the real magic happens: using --ngrokTunnel we configure the command to create an ngrok tunnel to our application and then configure the tunnel to point to the app running at node-app:9000 (which is the location of the site we started in the previous step).
By default the CLI puts the ngrok tunnel URL in a variable called {{ ngrokUrl }}, but the next line configures the CLI to change the name of the --ngrokUrlVariable to {{ startUrl }}.
Lastly we need to pass in the --ngrokToken:
--ngrokTunnel node-app:9000 \
--ngrokUrlVariable startUrl \
--ngrokToken ${{ secrets.NGROK_TOKEN }} \
This final flag instructs the CLI the output a non-zero status code if the test fails, which will cause GitHub Actions to fail the build. You can also use the screenshot to fail a build with --errorOnScreenshotFail:
--errorOnFail
It’s time for a change
With all the code pushed up to the main branch of our repository, it’s time to make a change to our test.
I’ve decided that I don’t like the selector that was recorded on the last step (where we make an assertion), it looks like a utility CSS class is being used (.fw-bolder), and I’d like the selector to be a little more specific.
Looking at the code, it seems like there is a better option by using the ID #submitSuccessMessage:
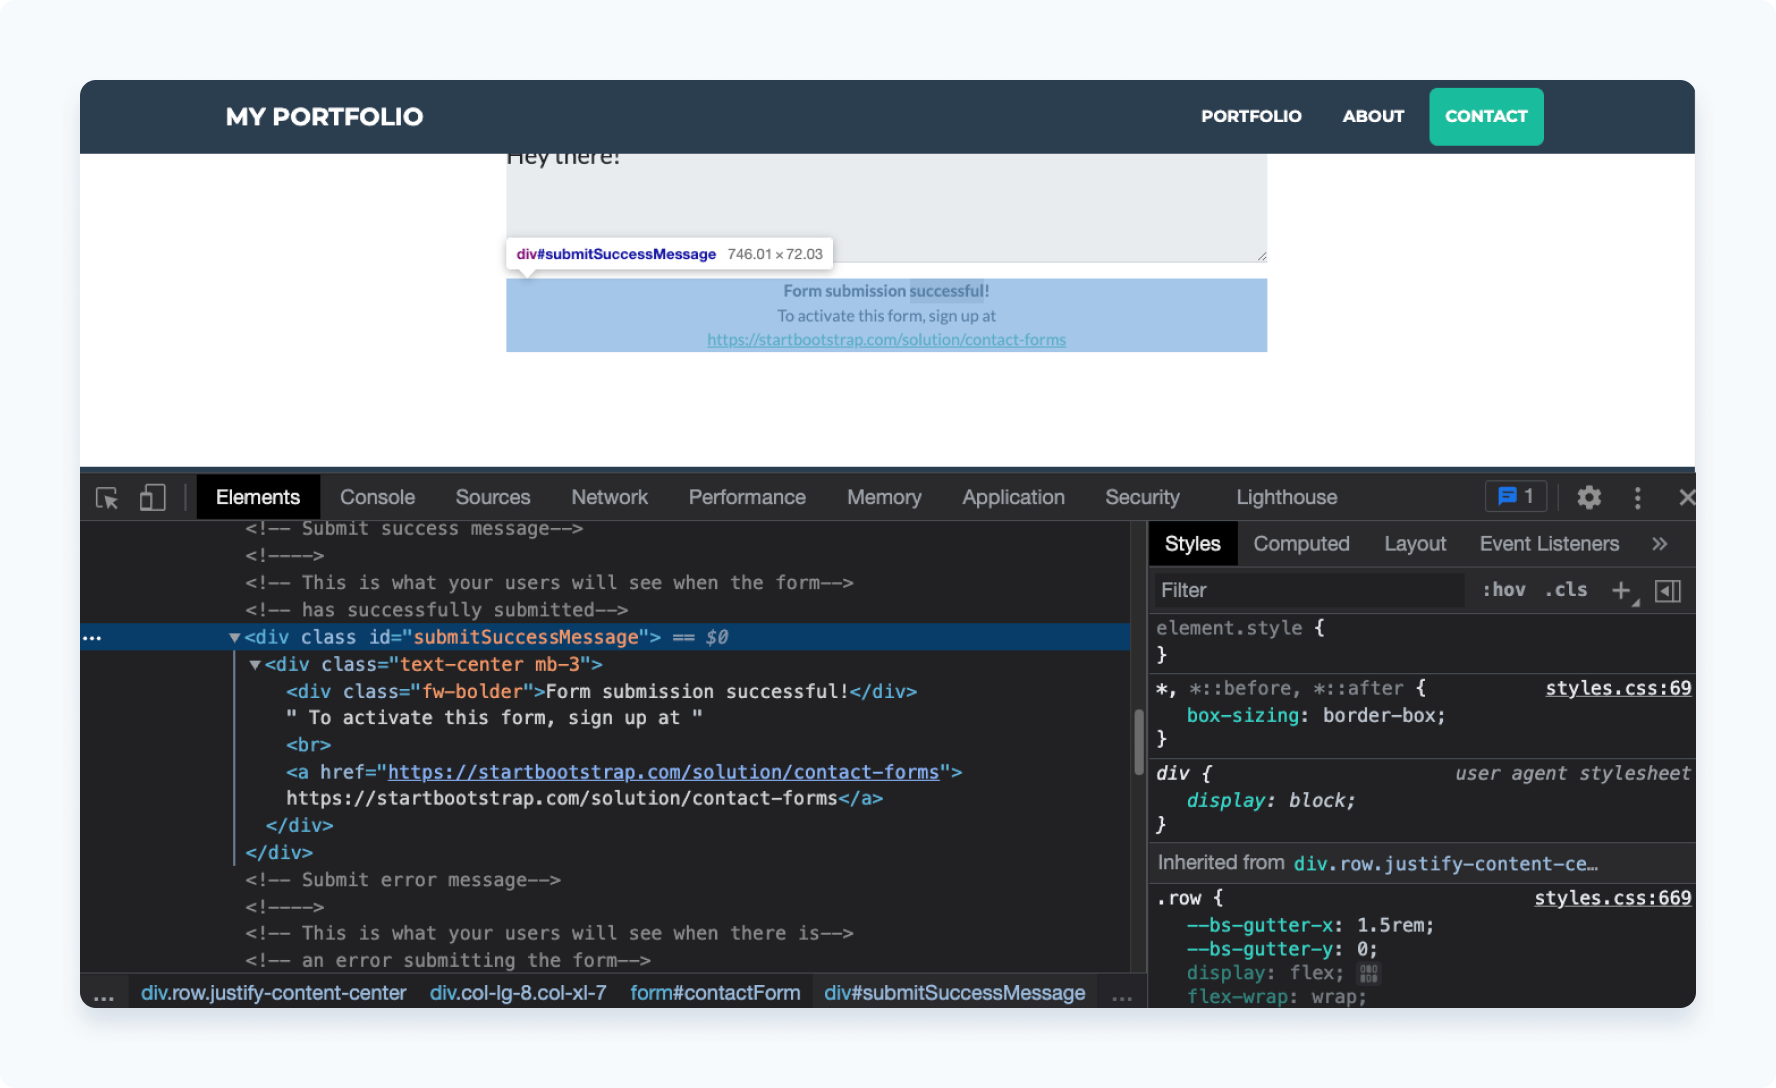
By the way, if you’re new to tinkering with the DOM and finding CSS selectors, we have a really great series on YouTube that can help you get started with it.
Making a branch and submitting the pull request
Now that I have a change I want to make, I’ll check out a new branch in my project, make the changes to the on-demand test, and then push the new branch up to GitHub:
git checkout -b update-assertion-selector
# ... make code changes
git commit -am "Improves assertion selector"
git push origin update-assertion-selector
As soon as I visit the project on GitHub, I can open a pull request for review by my team. Here we can see the changes:
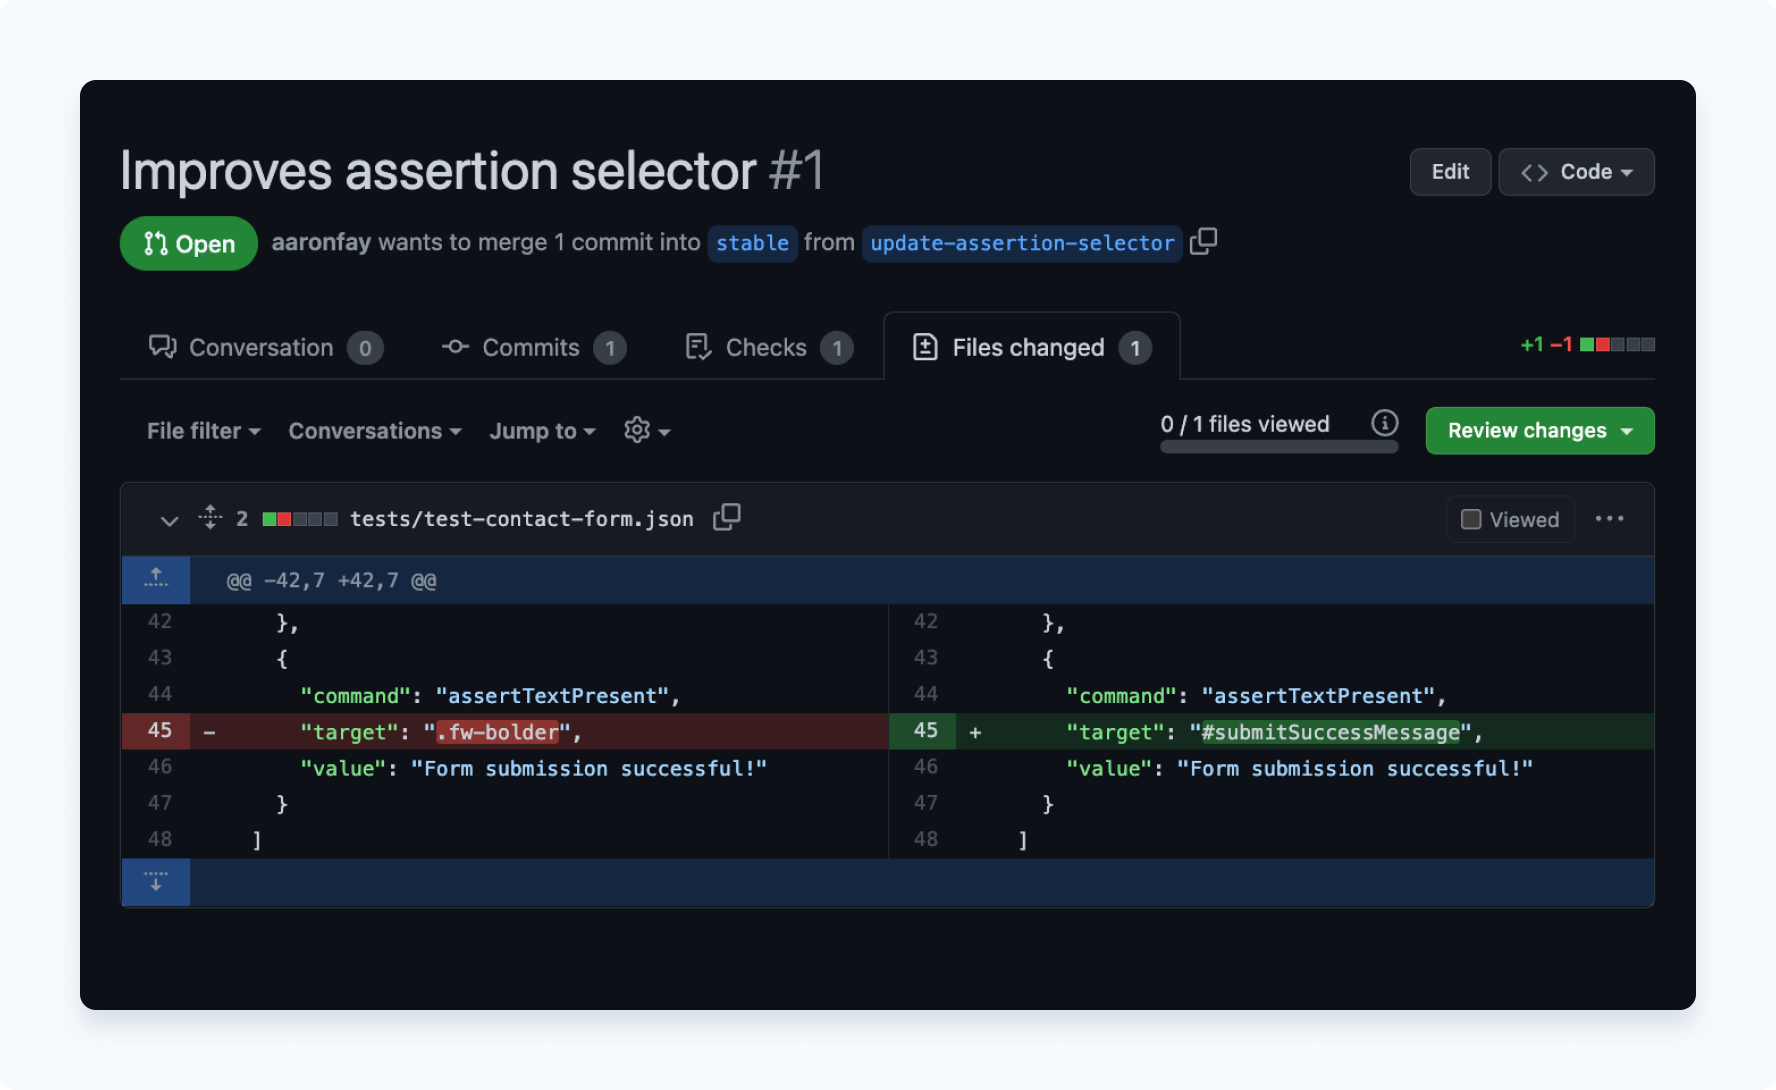
With the pull request open, we can check the GitHub Actions tab to see the workflow status. It looks like our workflow has passed! 🎉

And our pull request has been approved! 🙌
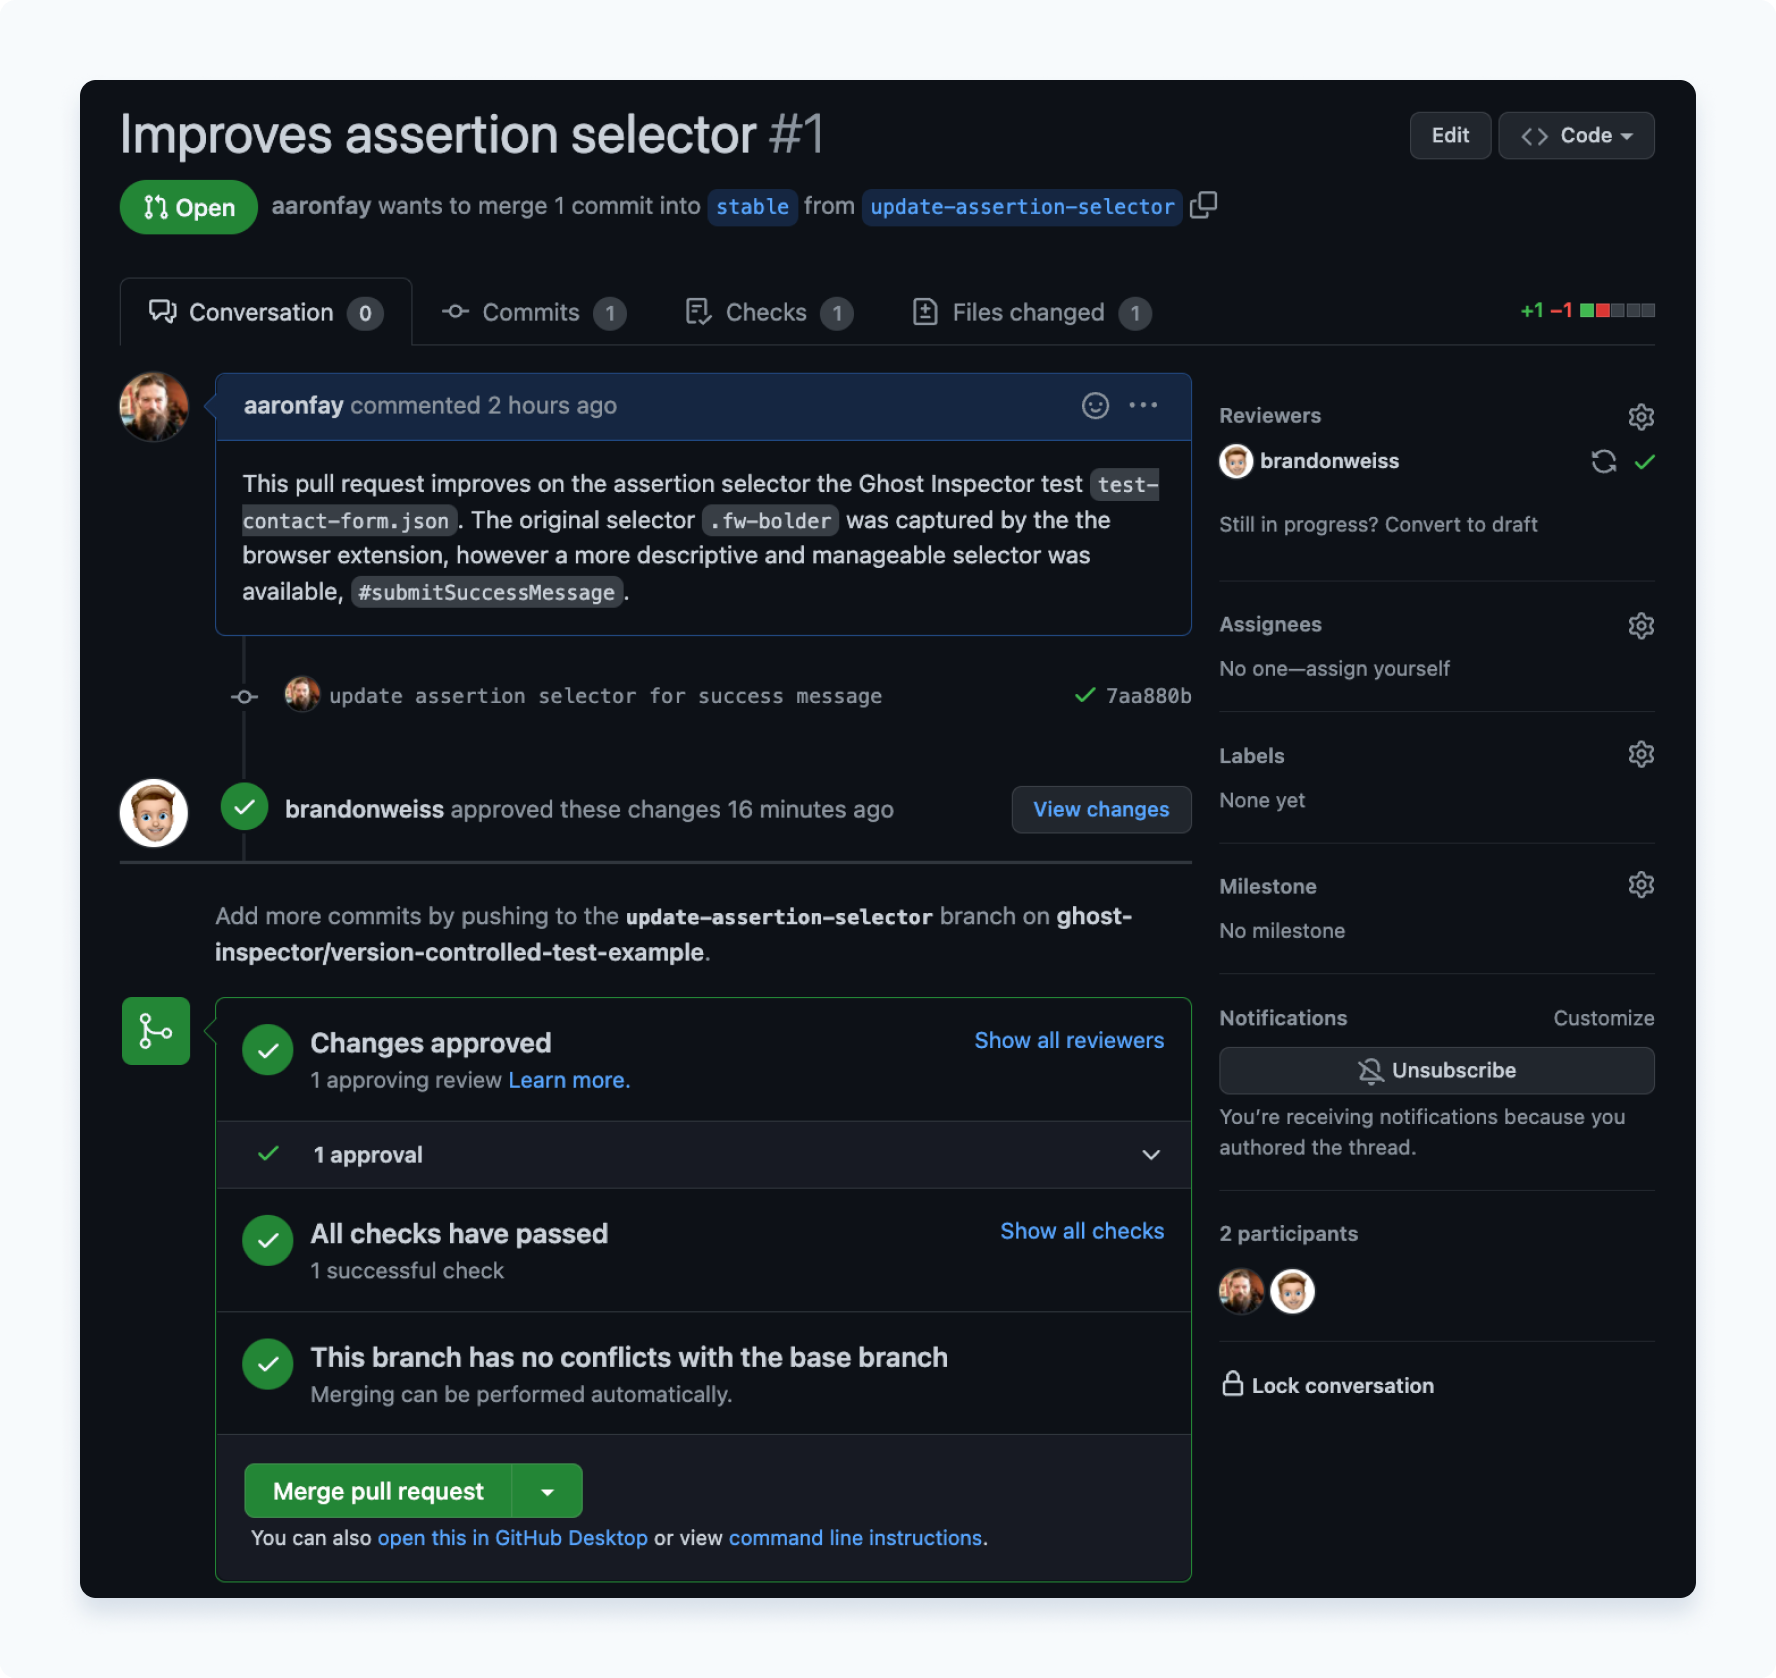
From here we can merge down the branch and carry on with the next change.
Wrapping up
Whew! 😅
We’ve covered a lot about version control in this post: recording a test, downloading it as JSON, saving it with our code, and running it on-demand in our CI system.
If desired, we could have another workflow that runs when the pull request is merged (again using the CLI) to update the original test within the Ghost Inspector application, keeping everything in sync!
Version control for the win! 🎉
We hope you’ll get a lot of use out of this feature and that it helps your teams keep in-sync. Be sure to check out the documentation for on-demand testing as well as our CLI. Feel free to reach out to support if you have any questions!