Overview
Jira is one of the most popular task management products available today, and for good reason: it’s been around for a long time. The team at Atlassian is constantly working to improve the way users can utilize their software, but for a long time if you wanted to integrate with Jira as a developer, your options were generally limited to the Jira API.
That changed recently with the release of Atlassian Forge, a cloud-based toolkit that allows developers to build their integrations right in the Atlassian infrastructure. Once we discovered Forge, we knew that an integration for Jira was going to be much simpler and quicker to implement.
How it works
Our official Jira integration works through the magic of Atlassian Forge Webtriggers which provide a webhook that can be called to trigger the integration logic.
It’s worth noting ☝️ Forge Webtriggers are currently in beta, which means there is the possibilty that some of the functionality might be adjusted by the Atlassian development team, but our testing so far has been very consistent.
Once you have the integration installed, you will be provided with a webhook URL in Jira that can be configured to your liking. It will look something like this:
https://a1b2c3d4-z0y8-9c8b-b40d-c043ac7cfde3.hello.atlassian-dev.net/x1/iLHet6ZqoXP5OR1SMShfKuA3gi4?id=d65b356Just plug that URL into your test’s or suite’s webhook notification settings (Settings > Notifications > Webhooks). The next time your test fails a new issue will be created in your Jira project! 🎉
Jira issue panel additions
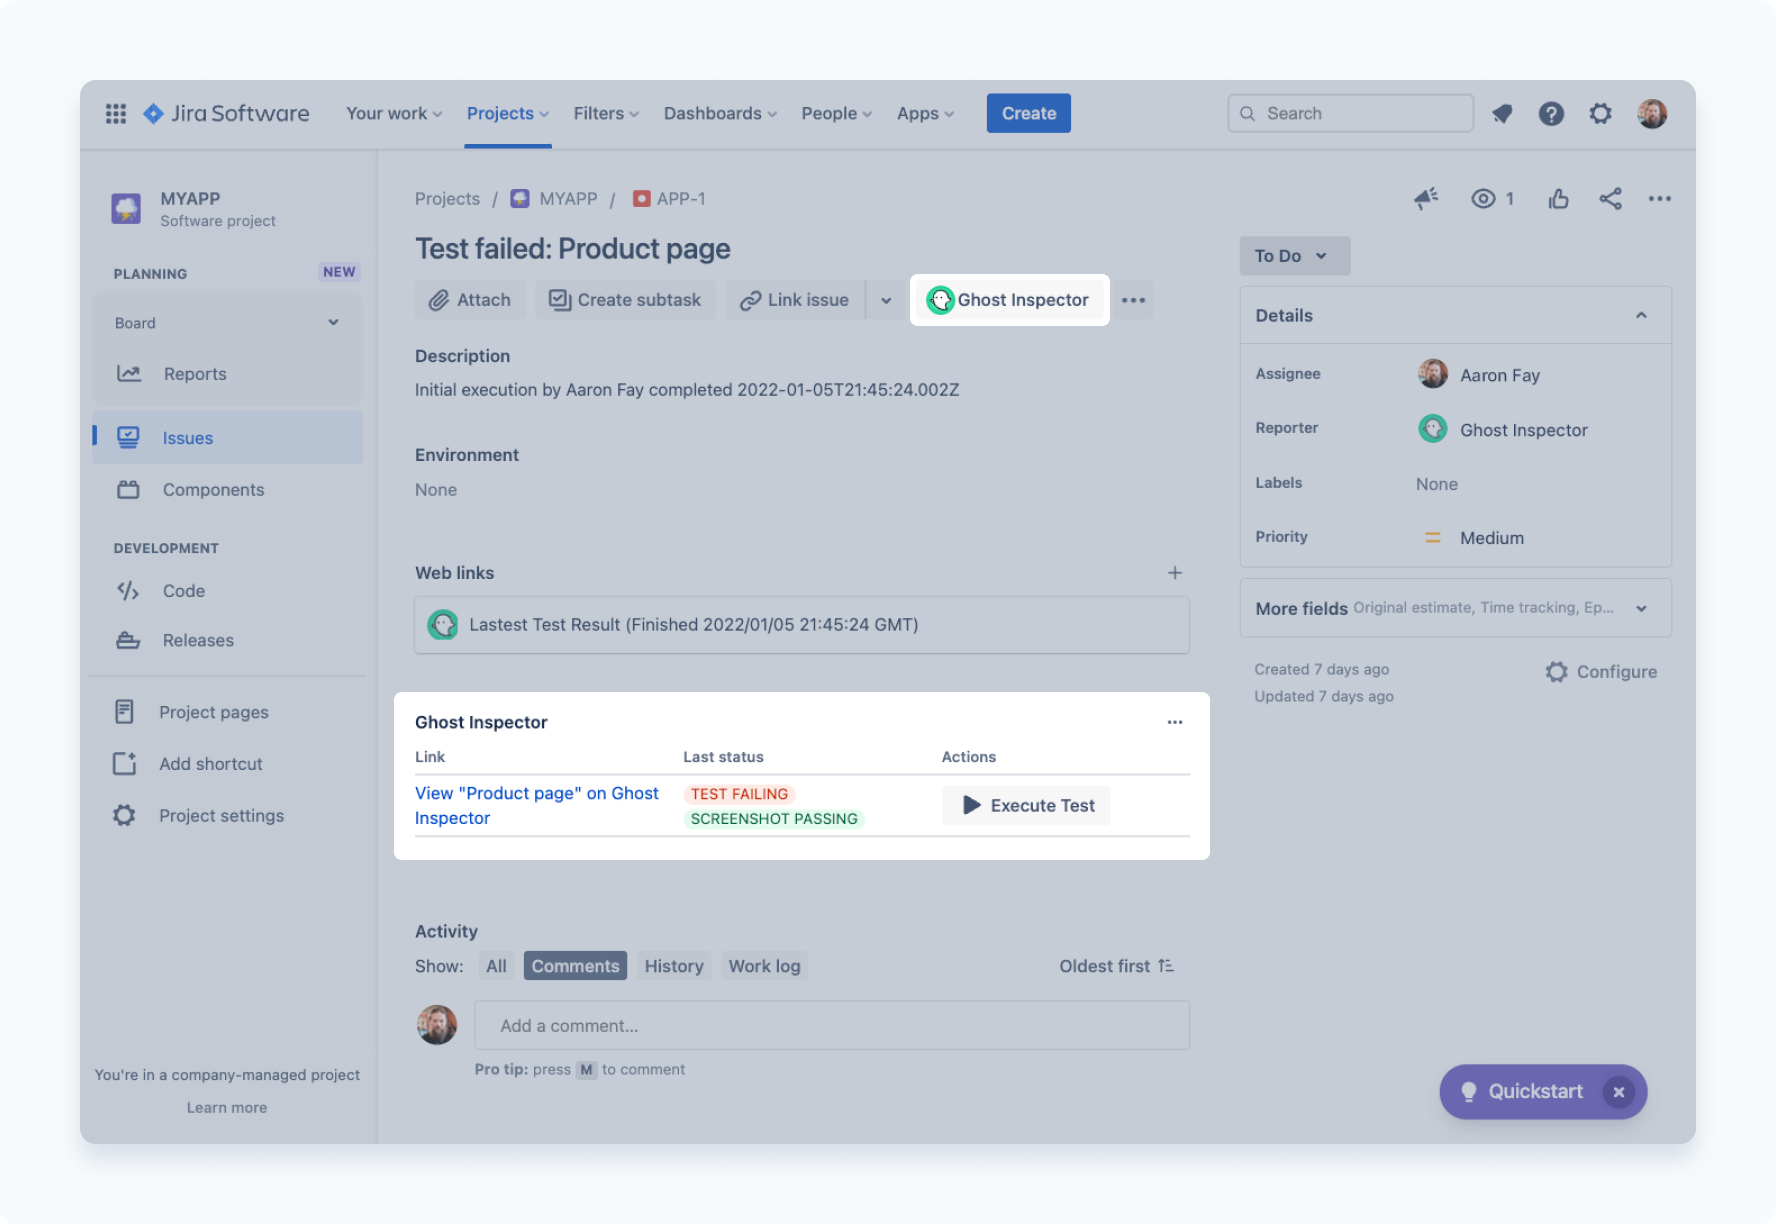
When a new issue is created within your Jira instance from Ghost Inspector, that issue will be automatically linked back to your test using a custom field named Ghost Inspector Test ID. With that, you can now also re-execute the test from within the Jira interface and see the results of the latest execution directly within your issue:

Just make sure your API key is configured to have access to all the new functionality.
Customizing the hook
When you initially set up the webhook, you’ll be asked which project you want new issues to be created in, what issue statuses you want to use for passing and failing tests, and whom you want to be the default assignee. However, all of these details can be configured manually on the webhook itself or through the use of test variables.
For instance, if you wanted to link a test to an existing issue in Jira (assuming your webhook is already configured in Jira & Ghost Inspector), you could add the jiraIssueKey to your first execution using Run test w/custom settings. On completion, the Jira integration will handle updating and configuring the issue moving forward.
Get started with the Jira integration
We’re really excited to be offering this integration! It’s been asked for a lot over the years! To start using it, head on over to the Atlassian Marketplace and click Get it now to get started. Don’t forget to check out our integration docs for all the installation and customization details.
We’re always looking for ways to improve our product for our customers. If you have any issues or would like to send us feedback about our Jira integration, please reach out to us via support.


