

How to build a codeless Ghost Inspector test in 4 quick steps
Ghost Inspector lets you create web tests in-browser through Firefox or Chrome by interacting with your website or web app just like a user would. The best part? No coding is required. However, if you are looking for more advanced features, Ghost Inspector offers complete end-to-end testing tools for more seasoned test builders, like support for synchronous and asynchronous JavaScript steps, flexible test execution across multiple environments with dynamic data sets, and seamless integration with third-party CI/CD pipelines.
But for today, we’ll be going through some Ghost Inspector 101: building your first codeless web test. Let’s get started!
Step 1: Install the Ghost Inspector Test Recorder
First, download the Ghost Inspector extension and sign up for a free trial account. With the extension, you can record in-browser actions to turn them into a fully automated test.
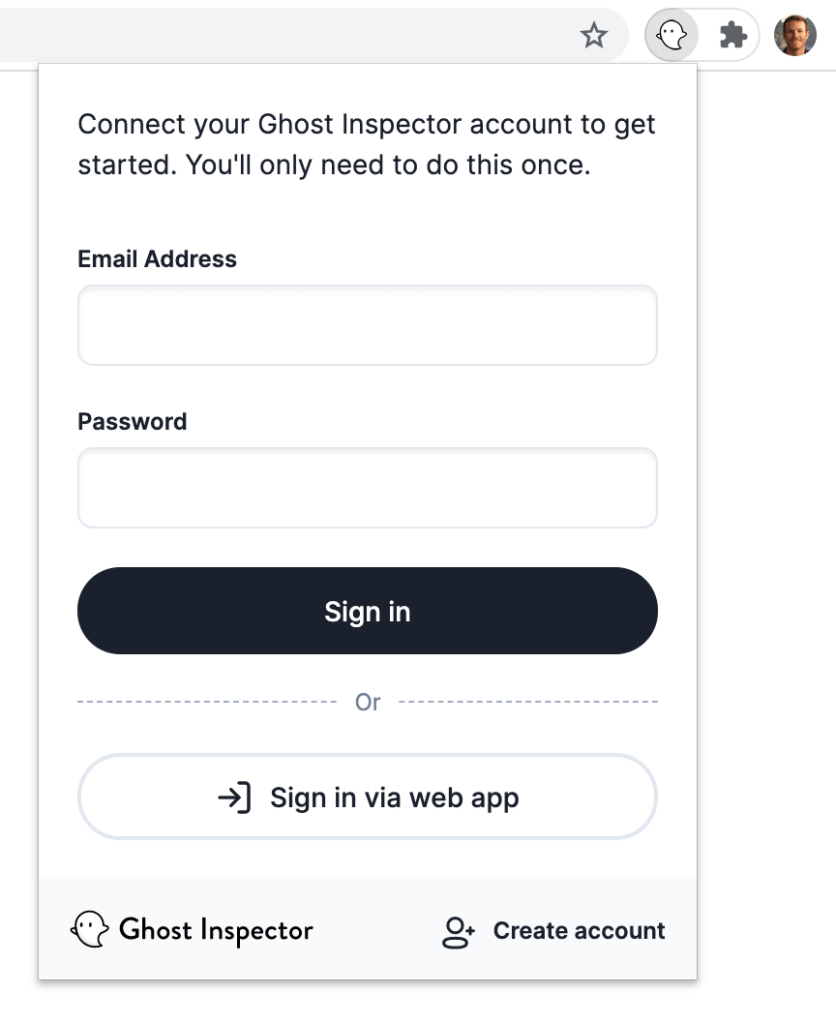
Once you’ve logged into the extension, you’re ready to start recording your first test!
Step 2: Record your test steps
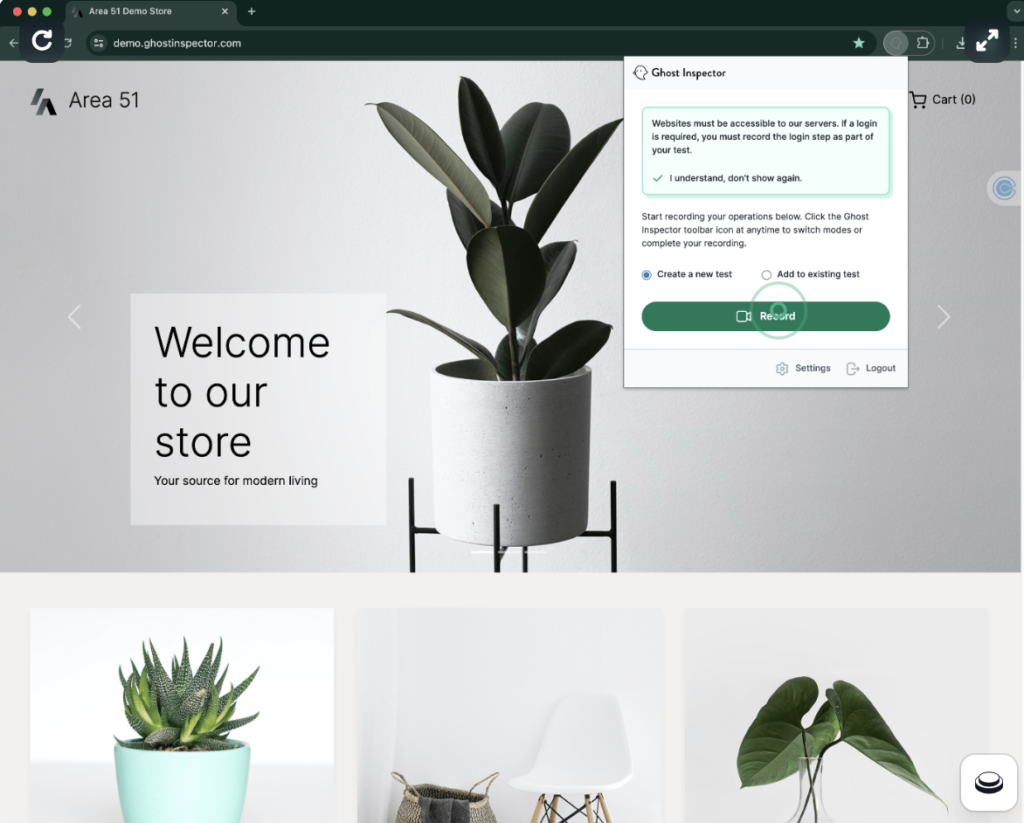
To help you get started, we have a demo site that mimics an online store with products, a shopping cart, and checkout, designed for testing purposes. You can use this or your own site to build your first test. In today’s article, we’ll be walking you through the steps using our demo site.
If you were in charge of quality assurance for an online store, you’d need to regularly test to ensure that its features were working correctly. With Ghost Inspector, you can automate this process by clicking through the specific section of the website you want to build a test for. For this first recording, we will be creating a short 5-step test to test the purchase flow, ie. make sure that the shopping cart and checkout button are working properly.
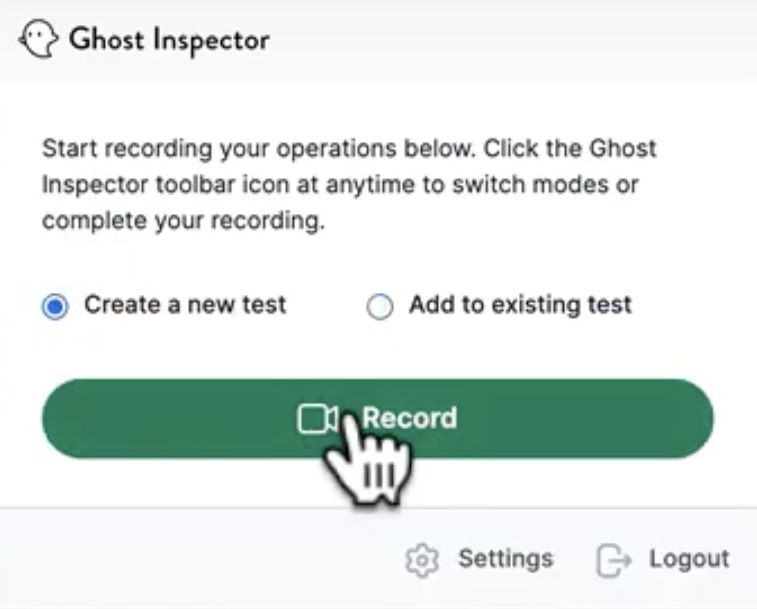
To start your test, click the Ghost Inspector icon in your browser. This bar provides the options to Create a new test or Add to existing test if you’re looking to edit a test you’ve already created. Create a new test should be pre-selected, so you can hit the Record button, and Ghost Inspector will start tracking all the actions you’re taking, including both left and right clicks, anything you drag-and-drop, and any new URLS or tabs opened during the test. You’ll know it’s recording when your extension icon turns green.
From here, you’re going to click through your first two actions. First, scroll down to the products on the page, hover over the first image of the Cup Planter, and click the Details button that appears. Next, click Add to cart.
For your third test action, you’re going to add an assertion, which is a type of confirmation checkpoint that verifies whether a component of your website is acting as it should.
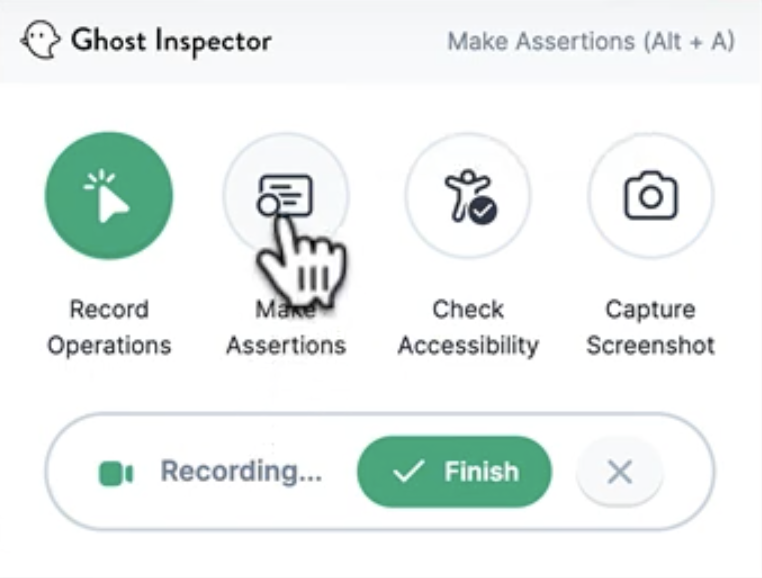
For this test, we’re going to assert that your UI includes an “Added to cart!” message. To do this, you’re going to click the Ghost Inspector toolbar icon and press the Make assertions button.
Note: There are two additional buttons available that we won’t be using to build our test:
- Check Accessibility: Checks the accessibility of your URL or screen to make sure the page is ADA compliant.
- Capture Screenshot: Easily take a screenshot during any point of your test build to add a screenshot step as a reference. Ghost Inspector also takes a screenshot at the end of every test by default as an ongoing check for visual errors.
When you hover your new crosshairs cursor over the “Added to cart!” message, you’ll see it outlined. Once you click the message, that outline will turn green and you’ll see confirmation that your assertion has been recorded.
The extension automatically determines whether to assert the existence of the clicked element or its text content. You can modify these assertions in the test editor after recording. When you’ve finished recording the assertion, switch back to Record Operations to finish building your test.
For your fourth action, you’re going to head to checkout by clicking the shopping cart icon in the top right corner. To confirm that the right product made it into your shopping cart, let’s add our fifth and final action: a quick assertion. Click the Ghost Inspector icon to open the extension, switch to Make Assertions and click on the product name—the Cup Planter we added earlier.
All five test actions have now been captured!
Step 3: Save your test
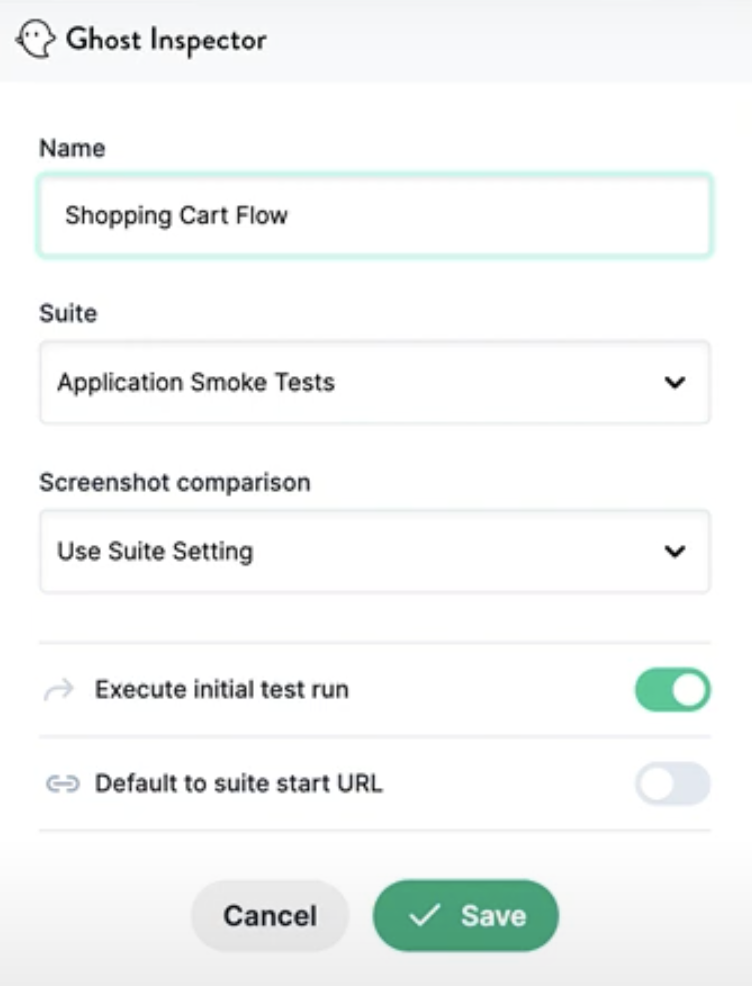
Once you’ve completed your test steps, click Finish to save the new test to your account. Now it’s time to name your test, choose which suite it will live in, and enable or disable the Screenshot comparison feature. If you toggle on Execute initial test run, Ghost Inspector will begin running this test automatically. Once you hit Save, you’ll be able to click View Test to see the results of your first test run in-app or Record New to start recording another test.
Step 4: Check your results
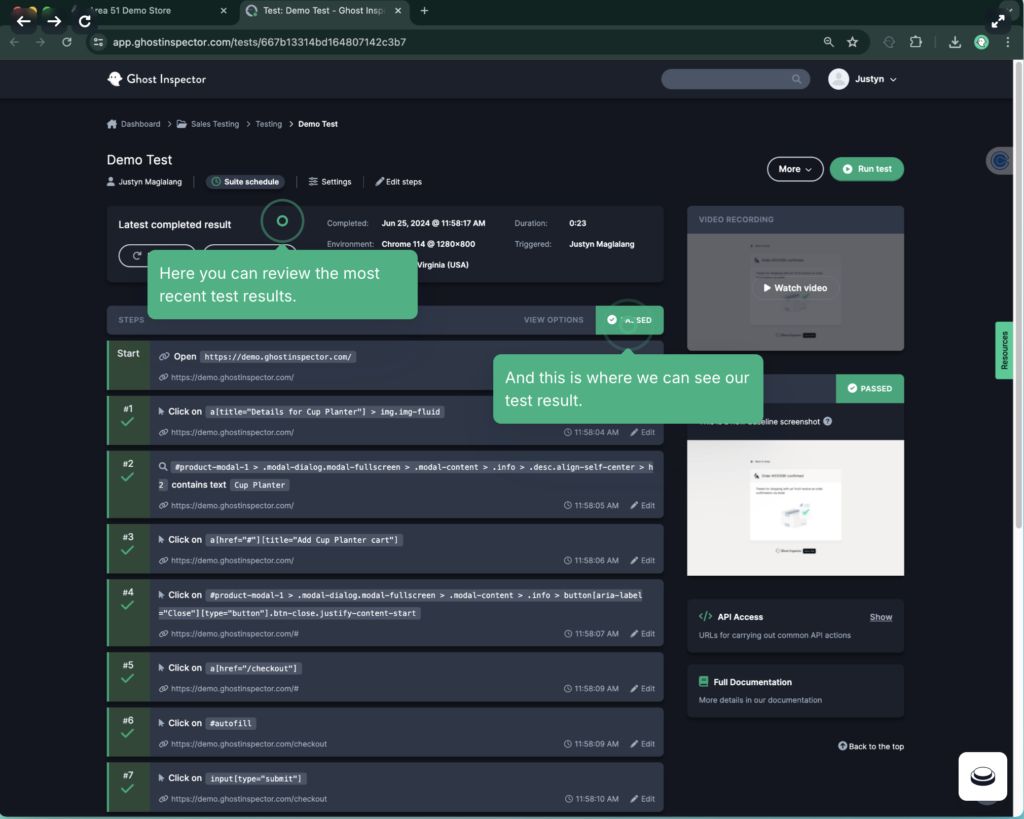
If you choose to view your test, you’ll be taken to the Ghost Inspector app, where you can see test details like the browser, resolution, and geolocation of the test you just recorded once it’s available. These features can be customized to add multiple browsers, resolutions, and geolocations. You’ll also be able to access a video of your test, showing Ghost Inspector going through the test actions you just created. From here you can also edit your steps and add conditions within the test editor to make changes as needed.
And that’s it! One codeless test—created and automated, just like that!
Conclusion
Congratulations, you’ve just successfully built your first automated test with Ghost Inspector! Now that you’ve got the basics down, you can go deeper and learn:
- How to reuse steps as modules
- How to use variables and JavaScript logic
- How to fix a test when it fails
And more!
We hope this tutorial helps you get up and running with our app. If you have any questions about recording your tests or have more complex needs, please feel free to reach out to our team at help@ghostinspector.com.
You can also check out a free live or pre-recorded demo of our app, so you can learn how to give everyone on your team the ability to build and run automated web tests!